
Arcade Cabinet
Last Updated: 10/2009
Arcade Cabinet
Last Updated: 10/2009
|
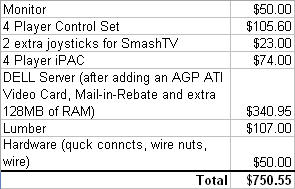
All parts needed to get this off the ground were aquired between June and August of 2004. To the left is the approximate costs
when my cabinet was originally built. Since then, I have ugraded the RAM to 1GB, nVidia GeForce 6600 and a DVD Burner. I also added a Smart Power Strip (it detects when you turn the PC on and off, as a result it turns on the marquee light, speakers and monitor). |
|
Highlights About the Hardware
|
|
|
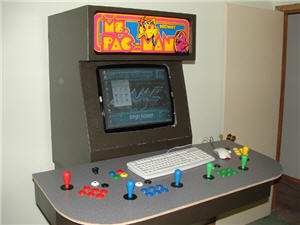
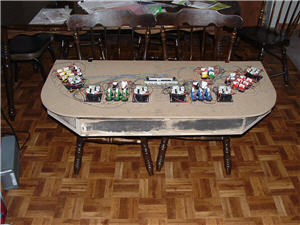
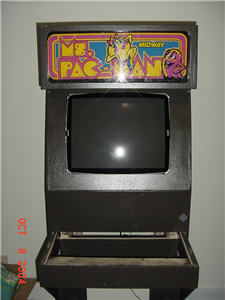
As of 5/30/2005, this is what my MAME cabinet looks like (and honestly not much has changed, except it's now in my basement bar). At this point, the unit has been assembled, Windows XP loaded and tweaked, and emulators loaded. This has been configured not just with the MAME emulator, but also emulators for Atari 2600, Nintendo, Super Nintendo, Sega Master, Sega Genesis (including SegaCD), and Turbo Grafix (including the SuperCD enhancement). |

|
|
I had to re-sand and re-paint the base to the controller and make some touch-ups (when I brought it home from Russ's place, it flexed in transit
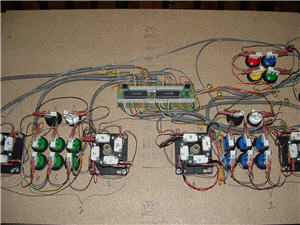
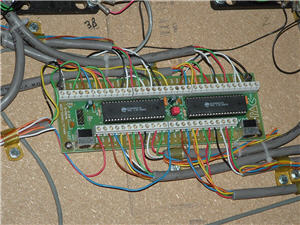
and I had to make some corrections to get it back into form). You can get an idea at the controller wiring. Because of my SmashTV want, my father gave me a hand with the wiring of my control panel (he had some ideas to make it a little better for my needs). A flip switch is in the upper left (near the MAME navigation buttons) that when it's toggled, activates the extra player 1 and 2 joysticks for SmashTV and de-activates the player 3 and 4 joysticks. This switch does this by controlling the grounds associated with those joysticks. In the center of all that wire is the iPAC. This thing is great! Using the software that comes with it, you can program all the connections to it with keyboard keys (or macros). Earlier pioneers of bulding MAME cabinets like these improvised by doing things like hard wiring the controls to an old keyboard (the keyboards commonly known for being loud and clankly because of how those keyboards accomodated soldering connections to them). Some people even used cheap PC game controllers to hack apart and hard wire the controls to. These iPACs from Ultimarc make those days a thing of the past for newbie MAME enthusiasts (like us) and simplifies the process. If needed, you can make different control layouts in the iPAC software to accomodate different emulators if needed and re-program your controls on the fly! So far, I have one "best fit" layout that has been working pretty good (minus some minor issues). |
|
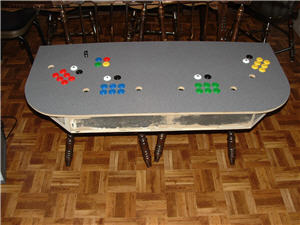
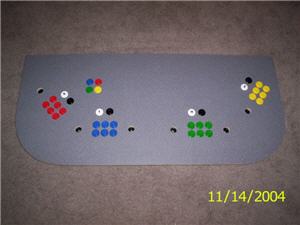
| I was now on my second control panel (and I had not had any panel yet wired). This is the panel I have currently. The buttons specifically used to navigate MAME are the for in the upper left corder (using clear labels from my Casio label maker, I even labeled them). The white button above each set of buttons has a logo on it for which player position that set is and is used as the player's start button. The black button is the used to indicate to the MAME emulator that a coin has been inserted (takes the place of the old coin slot that some of pumped tons of quarters and tokens into). |
|
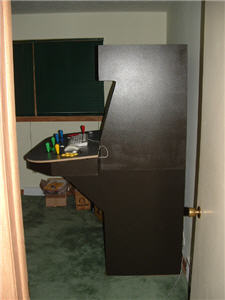
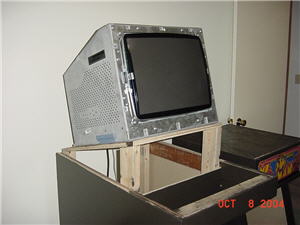
| I finally began to put the MAME cabinet together at my place (I still needed to finish the control panel). Russ came up with and awesome idea. When he designed and built these, he made them three pieces (a base, hood and control deck). From every MAME cabinet plan and site we've seen, we had yet to see someone with this concept. Russ did this to make the cabinet EASY to move in the average home (just dis-assemble and move it). This was proven when Chris and I brought our cabinets home from Russ's and later for me when I moved mine to the basement bar. |
|
|
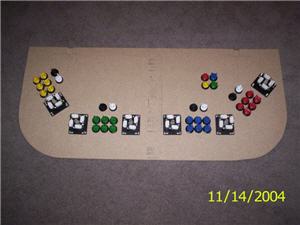
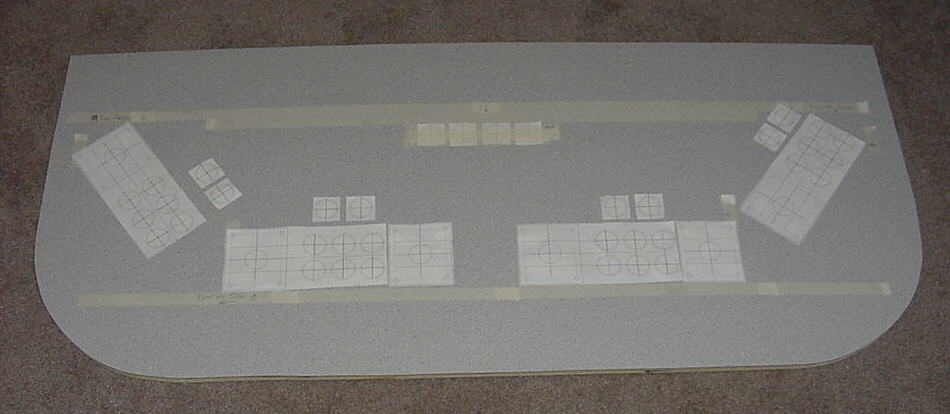
Russ cut me the board to be the top of my control panel. I actually went through two panels (mainly because I had wanted
to change the formica top and I also realised the buttons seen in the top center used for some of the MAME navigation were in a bad
spot (if I ever had to use a real keyboard on the PC). I used button/joystick templates I could print from the Internet to assist in creating the latout. If you click on the picture on the left, you will see a larger view. Since I like the two player game SmashTV (which requires two joysticks per player), you will notice the two center player positions (player 1 and player 2) have joysticks to the left and right of the buttons (for that one game). |
|
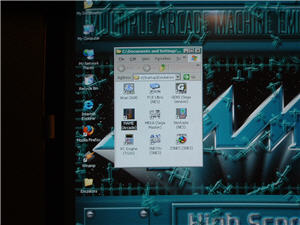
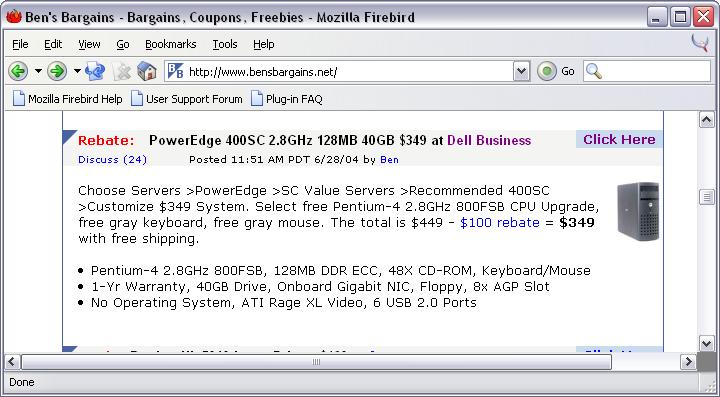
I had been scouting PC hardware for our needs. Looking for something in the realm of a Pentium 4, a good starter for MAME
and hopefully upgradable to be used for other video games beyond just MAME. I was looking at options of building a PC and
spec-ing the individual components. Not long did the deal on the DELL PowerEdge budget-server present itself (click the
screenshot on the left to enlarge the screenshot). We ordered these and were all excited (even though we needed to upgrade
the video card and eventually more RAM and a bigger hard drive would be desired), we could not build a Pentium 4 with hardware this
good for this price. This deal was $350 after rebate and shipping. The day I received mine, DELL offered the same deal, but lowered the initial price $50 (making my $350 deal no $300 said and done). I was not happy that I did not have it out of box one day before the price got sweeter. I managed to call DELL and they kindly adjusted the price difference. |
|
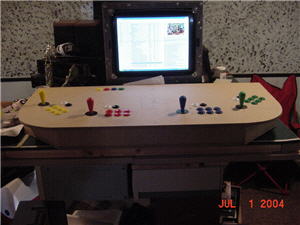
7/1/2004 was a great day! Chris, Russ and I had been working to get a proto-type of the controller built.
We had all the monitors, iPACs, controllers and buttons for all three builds. The big challenge was for Russ to build the
first control deck for us to test a four player layout. Russ managed to model the proto-type off of an arcade-style
controller called the SlickStick. Once he built it, Chris quickly mounted and wired the controls in to it. Chris set the monitor on a table in his basement, the control deck in front of it and since we did not yet have dedicated PCs for MAME, powered the show from his laptop (as seen in the pics and video link below). We considered the test a success! What we were checking for was that the controls worked and that player locations were well spaced and each player could see the screen. With the exception of a couple of wires that needed re-tightened, it worked perfectly. Despite how well this layout worked, I had to modify mine for SmashTV play (which was done later one, again, this was the first and only one at the time). |
|
It is recommended you right click the links below and select Save Link As. Short Video 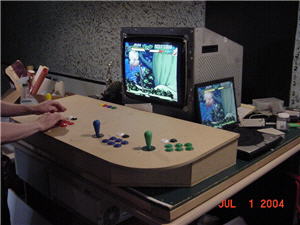
|
Additional MAME Arcade Links of Interest
| http://www.ultimarc.com - MAME PC Hardware Interface Supplier (iPAC) |
| http://www.centsibleamusements.com - Misc Arcade Parts |
| http://www.arcadeathome.com |
| http://www.mameworld.net |
| Raza's MAME/JAMMA Arcade Cabinet |
| http://www.klov.com - Killer List Of Video Games |
Page Created by: Jason Morris
Back to LAN Parties and Computer Related!
